
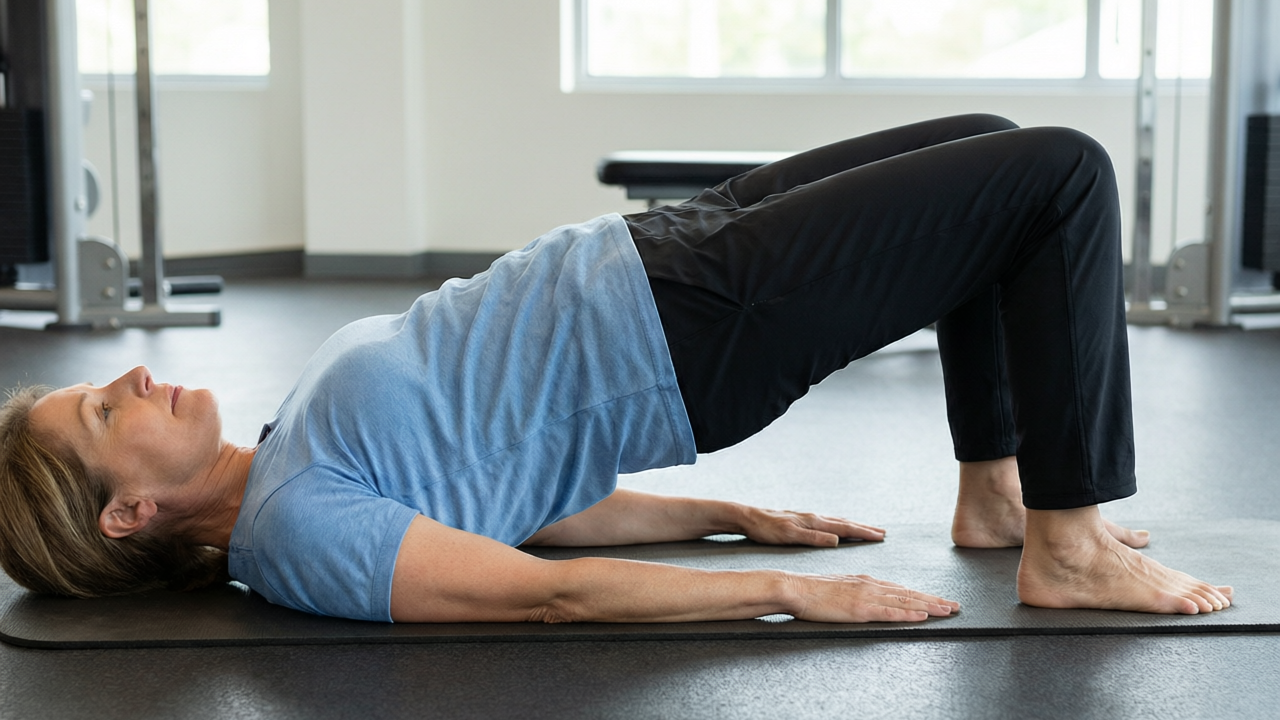
Glute Bridge
glute-bridge
주의할 점
- modify · Acute knee injury — The heels are placed close to the glutes, which puts the knee through a deep bend under load, and a knee that dislikes that will say so. Slide the feet further out until the bend is comfortable and the work stays in the hip — that shifts demand to the hamstrings and away from the joint. If deep flexion still hurts, substitute Wall Hip Hinge, which trains hip extension with the knee nearly straight.
- modify · Hip replacement (post-op) — Lying on the back with the knees drawn up flexes the hip deeply, which is inside the range most surgeons restrict early on, and letting the knees fall apart adds adduction the new joint should not have to resist. Keep the feet further out for a shallower hip angle, hold the knees parallel — a band above them helps — and lift only to the straight-line position. Confirm the safe range with the team that did the replacement before adding load.
- modify · Acute lower back injury — The hips only go higher than the shoulders-knees line once the lumbar spine is allowed to arch, and that over-press is what a reactive back objects to — the top position in step 5 is the ceiling, not a target to beat. Stop where the body is straight, squeeze the glutes rather than lifting further, and flatten the back into the floor before each rep as step 4 says. If the arch appears every set, shorten the range and add reps instead of height.
- modify · Pregnancy — Supine positions after the first trimester can compress the vena cava. Perform this movement on an incline (upper back supported on a bench or couch) or substitute with Standing Cable Pull-Throughs to maintain glute activation safely.
When I settle into a glute bridge, I immediately feel that deep, satisfying burn waking up across my posterior chain. Each rep should feel like a controlled, deliberate squeeze at the top, where my hips drive upward without my lower back taking over. The rhythm builds a steady, grounded heat, leaving my glutes fully engaged and ready for whatever comes next.
처음이라면
Focus on keeping your ribcage stacked directly over your pelvis to prevent your lower back from taking over the lift. As you drive upward, consciously pull your belly button toward your spine and imagine pulling your heels backward against the floor without actually sliding them. If you feel a sharp pinch in your lumbar spine or notice your hips sagging before you reach the top, that is your signal to stop the set and reset your alignment. Beginners often compensate by overextending the spine or pushing too hard through the toes, which shifts the workload away from the glutes and into the quads. Start with two to three sets of eight to twelve slow, deliberate repetitions. When fatigue sets in, you will notice the contraction weakening and your form becoming shaky, which is exactly when you should rack the set. Trust that consistency matters far more than speed, and celebrate every rep where you feel that targeted squeeze in your posterior chain rather than a general ache across your entire back.
더 나아가기
To make this bodyweight movement genuinely challenging, extend the top hold to three seconds and lower over four. That extra time under tension is what makes a one-out-of-five exercise feel demanding without external load. Rep ranges of fifteen to twenty suit this tempo; once you can complete three sets of twenty with a full contraction at the top and no lumbar drift, you have outgrown the bilateral version. At that point, shift to the single-leg glute bridge, keeping the working foot planted whilst the other leg extends straight. This doubles the demand on each hip and introduces a rotational stability challenge your core must manage. If you prefer to stay bilateral and add load, the barbell glute bridge is the natural next step, letting you work in heavier six-to-ten rep ranges. Placing your feet slightly wider shifts emphasis toward the outer glutes, whilst bringing them closer together biases the inner fibres.
흔한 실수
The most frequent error is hyperextending the lumbar spine at the top of the movement, which shifts the load away from the glutes and places unnecessary strain on the vertebrae. Many lifters also rush through the eccentric phase, allowing gravity to drop their hips too quickly and missing the crucial stabilizing work of the descent. Another common flaw involves flaring the knees outward or inward instead of tracking them directly over the midfoot, which disrupts hip alignment and reduces muscular recruitment. Finally, some practitioners push excessively through their toes rather than their heels, inadvertently recruiting the quadriceps and turning a posterior chain exercise into a knee-dominant movement. Correcting these patterns requires slowing the tempo, prioritizing spinal neutrality, and consciously driving through the midfoot and heel.
루틴
- Sets
- 3
- Reps
- 10-15
- Rest
- 60s
- Tempo
- 2-0-1-1
- RPE
- 7
- Per set
- ~90s
- 빈도
- 2-3x/week
Add a barbell across the hips for increased load, or progress to single-leg variations.
Cues
근육
- Glutes
- Hamstrings
- Abs
준비물
- Bodyweight
- 1
Lie flat on your back with knees bent and feet flat on the floor.
- 2
Position your feet hip-width apart with heels close enough to graze your fingertips.
- 3
Press your lower back completely flat against the floor and tuck your chin.
- 4
Inhale deeply through your nose while tightening your core.
- 5
Push through your heels to raise your hips until your shoulders, hips, and knees align in a straight line.
- 6
Exhale fully at the top while squeezing your glutes hard.
- 7
Hold the top position for one second without overarching your spine.
- 8
Inhale slowly as you lower your hips back down to the starting position with control.
- 9
Flatten your back against the floor and reset your posture before starting the next repetition.