
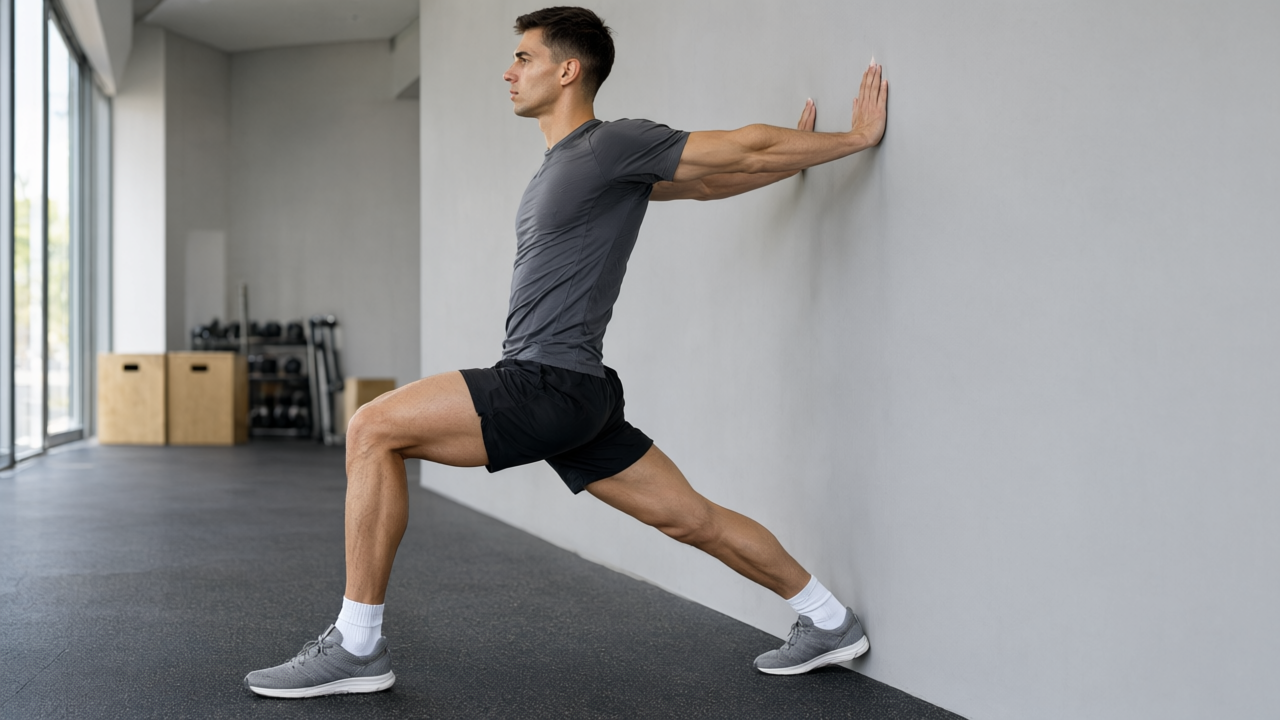
Wall Hip Flexor Stretch
wall-hip-flexor-stretch
सावधानी बरतें
- modify · Acute knee injury — The front knee is bent under bodyweight and held there in a static position, which is uncomfortable to genuinely aggravating depending on how far forward the shin travels. Step the back foot further out so the front knee stays behind the ankle and bend it less. Instead, use Glute Bridge, which opens the front of the hip through a short glute squeeze with no knee load at all.
- modify · Acute lower back injury — Pressing the hips forward against a straight back leg tilts the pelvis, and if the stretch arrives in the lower back rather than the front of the hip you have levered the spine instead of opening the hip. Squeeze the back glute, tuck the tailbone as step 5 says, and shorten the stride. If the back still takes it, substitute Glute Bridge, which retrains the same pelvic position with the spine supported on the floor.
I want you to feel a gentle, sustained pull at the front of your hips, never a sharp pinch or back strain. When you settle into this stretch, your breathing naturally deepens as the tension melts. A successful hold leaves you feeling lighter on your feet, with a quiet pelvic release and renewed readiness to move. Trust the wall, breathe deeply, and let your body open.
यदि आप इसमें नए हैं
As you step into this stretch, remember that mobility is a conversation with your nervous system, not a battle. Keep your front heel firmly planted to prevent your knee from drifting past your toes, and focus on actively squeezing the glute of your trailing leg. This glute contraction naturally pulls your pelvis into a posterior tilt, which is the exact mechanism that targets the hip flexor safely. If you feel sharp pinching in your lower back, you have leaned too far or lost your pelvic tuck. Back off immediately until your spine feels neutral again. You should never push into joint pain or a burning sensation in the knee; a mild, dull pulling along the front of the hip is your target range. If your balance wavers, widen your stance slightly or place a folded towel under your back knee for cushioning. Progress will feel subtle at first, and that is completely normal. Trust the slow, steady breaths and give your tissues time to adapt without forcing the range.
आगे बढ़ें
Once the standard hold feels routine, extend your time under tension to sixty or ninety seconds per side. Harder here means refining leverage rather than adding load: step the trailing foot further back while keeping the heel flat, or deepen the posterior pelvic tilt until the stretch reaches higher into the abdomen where the psoas originates. Slow everything down. Take three full breaths to ease into the end range, pause there for five seconds, then add small, controlled pulses of no more than two centimetres to explore tissue tolerance without bouncing. When you can hold ninety seconds cleanly with a pronounced tilt and no guarding, progress to a couch stretch, which anchors the rear shin against a wall to intensify the demand on the rectus femoris. Alternatively, try the half-kneeling hip flexor stretch, removing the wall entirely to challenge your balance and trunk control whilst targeting the same tissues.
सामान्य गलतियां
Most people rush the setup by placing their back foot too far behind them, which forces the knee into an awkward angle and shifts tension away from the hip flexor. Another frequent error is allowing the lower back to hyperextend as you lean forward, which turns a targeted stretch into a spinal compression issue. I also see many practitioners hold their breath or clench their jaw, which signals the nervous system to guard the muscle rather than release it. Finally, leaning too aggressively into a wall without first establishing a pelvic tuck simply stretches the lumbar spine instead of the intended tissue. Slow down, prioritize alignment over depth, and let the stretch accumulate naturally.
रूटीन
- Sets
- 3
- Reps
- 20-30s per side
- Rest
- 30s
- RPE
- 3
- Per set
- ~60s
- बारंबारता
- 3-5x/week
Gradually increase hold duration, refine posterior pelvic tilt for a deeper stretch, or add controlled dynamic pulses.
Cues
मांसपेशियां
- Hip flexors
- Glutes
- Quadriceps
उपकरण
- Bodyweight
- 1
Stand facing away from a sturdy wall with feet shoulder-width apart.
- 2
Place both palms flat against the wall at shoulder height for light support.
- 3
Step the right foot back two feet, keeping the leg straight and heel flat on the floor.
- 4
Bend the left knee until it aligns over the left ankle while maintaining a straight right leg.
- 5
Tuck the tailbone under and press the hips forward to engage the stretch in the front of the right hip.
- 6
Inhale to lengthen the spine, then exhale to hold the position steadily for thirty seconds.
- 7
Inhale as you step the right foot forward to return to a neutral standing posture.
- 8
Release your hands from the wall, lower your arms, and roll your shoulders back to reset.