
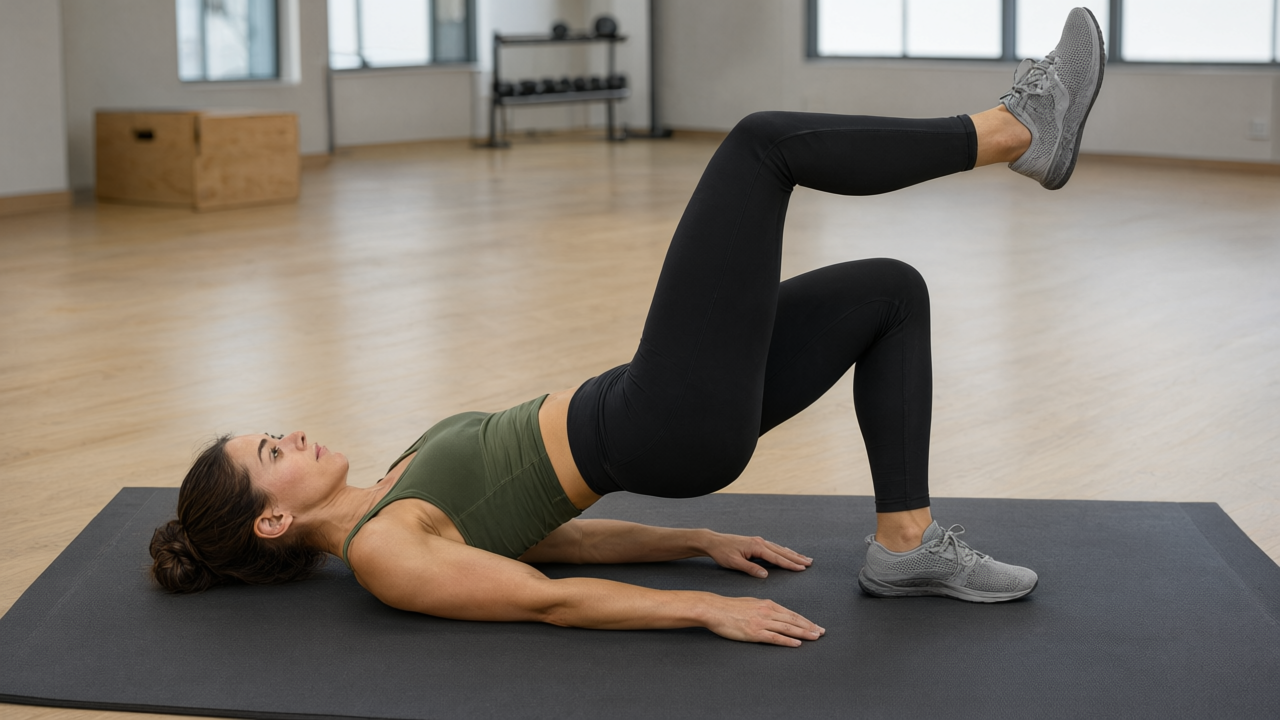
Single-Leg Glute Bridge
single-leg-glute-bridge
Faites attention à
- avoid · Hip replacement (post-op) — Unilateral hip extension places asymmetric torque on the prosthetic joint and surrounding soft tissue. Instead, use supported bilateral glute squeezes lying flat on the mat.
- caution · Acute lower back injury — Hip extension under unilateral load can compress the lumbar spine if the pelvis tilts anteriorly. Instead, perform a standard bilateral glute bridge with a reduced range of motion.
When I cue you into the single-leg glute bridge, I am asking you to isolate one hip at a time. You lie on your back, plant one foot, and lift the other off the mat. Driving through the planted heel, you raise your hips until your body forms a straight line. This exposes side-to-side imbalances and builds unilateral glute strength without loading your spine.
Si vous débutez
The first time you try this, your hips will almost certainly twist or drop on the side of the lifted leg. That happens because the working glute is not yet strong enough to stabilise your pelvis alone. To fix it, place your hands lightly on your hip bones so you can feel whether they stay level; if they tilt, reduce your range of motion by only lifting halfway up. You should feel a deep squeeze in the glute of your planted leg, not a cramp in your hamstring or strain in your lower back. If your hamstring cramps, slide your planted foot slightly further away from your body. If your lower back arches painfully, you are lifting too high or failing to brace your abs. Stop the set when you can no longer keep your hips level or when you feel your form breaking down, even if you have not finished your planned repetitions. Master the standard two-leg glute bridge first if this feels impossible.
Aller plus loin
Control the tempo strictly: take three seconds to lower your hips and pause for two seconds at the top of every repetition. Aim for twelve to fifteen controlled reps per side before progressing. Once bodyweight becomes easy, increase difficulty by elevating your planted foot onto a step or holding a weight across your hips. For a greater stability challenge, extend the lifted leg completely straight rather than holding the knee at ninety degrees; this lengthens the lever and forces your core to work harder against rotation. Use this movement as an activation drill before heavy bilateral lifts like squats or deadlifts, performing two sets of eight reps per side at a brisk but controlled pace. Do not add load until you can complete twenty bodyweight reps per side with perfectly level hips and zero compensatory twisting.
Erreurs courantes
The most frequent error is allowing the hip of the lifted leg to sag towards the mat, which shifts tension away from the working glute and places rotational stress on your lower back. Keep your hips square by squeezing your abs and imagining a glass of water balanced on your pelvis. Another mistake is overextending at the top, pushing the hips so high that your lower back arches instead of your glutes finishing the movement. Stop rising the moment your body forms a straight line from shoulder to knee. Many people also push through their toes rather than their heel, which recruits the quads excessively and reduces glute engagement. Finally, rushing the descent wastes the eccentric portion of the lift; lower yourself deliberately to maximise muscle tension throughout the entire range.
Routine
- Sets
- 3
- Reps
- 10–15 per side
- Rest
- 45s
- Tempo
- 2-1-3-0
- RPE
- 7
- Fréquence
- 3
Add reps, then elevate the planted foot or hold a weight across the hips.
Cues
Muscles
- Glutes
- Hamstrings
- Abs
- Lower back
Matériel
- Bodyweight
- Mat
- 1
Lie on your back on the mat with both knees bent and feet flat on the floor.
- 2
Bend one knee to ninety degrees and lift that foot off the mat, holding it steady.
- 3
Press your lower back gently into the mat and brace your abs before moving.
- 4
Drive through the heel of your planted foot to lift your hips towards the ceiling.
- 5
Exhale as you rise, stopping when your shoulders, hips, and planted knee form a straight line.
- 6
Hold the top position for one second, keeping both sides of your hips perfectly level.
- 7
Inhale as you slowly lower your hips back down until they hover just above the mat.
- 8
Complete all repetitions on this leg, then place your foot down and switch sides.