
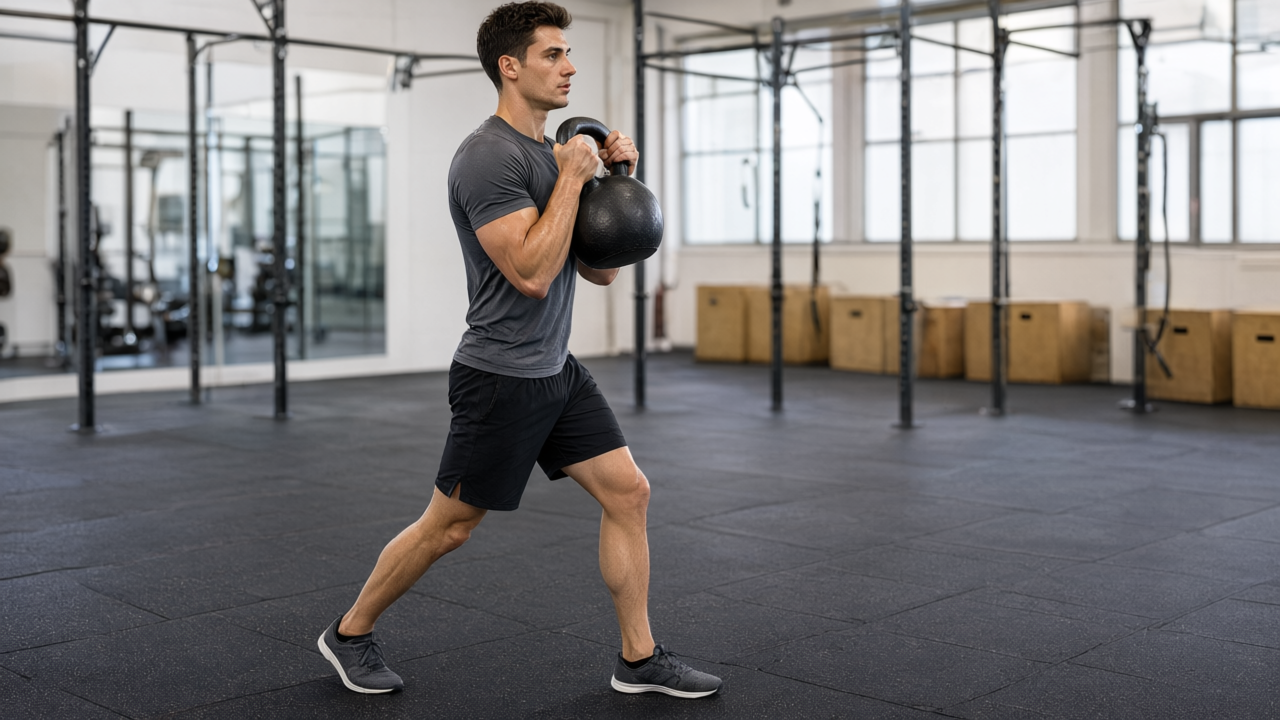
Front-Rack Carry
front-rack-carry
ควรระวัง
- avoid · Uncontrolled hypertension — Sustained bracing and breath-holding during carries can cause dangerous blood-pressure spikes. Instead, perform slow farmer's walks with lighter loads and continuous breathing to build stability safely.
- caution · Shoulder impingement — Holding the kettlebell in the front rack forces sustained shoulder flexion that can compress the subacromial space. Instead, perform low farmer's carries with arms hanging naturally to load the core without irritating the shoulder.
- caution · Acute lower back injury — Asymmetric front-rack loading creates rotational shear force on the lumbar spine if the core brace fails. Instead, perform suitcase carries with a very light kettlebell to train anti-lateral flexion without spinal compression.
- caution · Pregnancy — Heavy abdominal bracing increases intra-abdominal pressure against the growing uterus and pelvic floor. Instead, perform bodyweight walking drills focusing on upright posture and gentle core engagement without maximal bracing.
When I nail a proper front-rack carry, the kettlebell rests dense and secure against my forearm. My midsection braces like a solid pillar, keeping my spine neutral while my shoulders stay relaxed. Each step lands with deliberate weight, sending a steady, grounded pulse through my entire frame. It never feels frantic. Instead, it’s a calm, unbroken rhythm where breath and tension sync perfectly, leaving me strong, upright, and completely in control.
หากคุณเพิ่งเริ่มต้น
If this is your first time, focus entirely on posture before distance. Begin with a lighter kettlebell and keep your steps short and quiet. Imagine a string pulling the crown of your head toward the ceiling while you actively pull your shoulder blade down your spine. Keep your ribs stacked over your pelvis; if you feel your lower back arching or your weight shifting to the outside edge of your foot, reset immediately. True failure arrives when you can no longer maintain that neutral spine, when your elbow starts drifting away from your torso, or when your breathing becomes shallow and panicked. Stop the set the moment your form degrades, not when your muscles completely give out. Beginners often compensate by hiking the shoulder toward the ear or leaning their torso away from the load. Trust the movement, keep the weight close to your centerline, and build your endurance gradually. You will quickly notice how a few focused carries translate to better posture and core resilience in everything else you do.
ก้าวต่อไป
To make this carry genuinely demanding, slow your steps so each foot spends a full second on the ground before the next lifts. That extended single-leg stance forces your obliques to fight rotation far harder than a brisk walk. Build distance first, aiming for sixty steps per side before touching a heavier kettlebell. Once you can manage that cleanly at an RPE of 8, move up in weight and drop back to thirty steps. When load plateaus, introduce a three-second dead stop every ten paces; restarting from stillness strips away momentum and exposes any weakness in your brace. If you have mastered the single-kettlebell version without lateral lean, progress to a double front-rack carry with two kettlebells, which doubles the anterior load and demands significantly greater thoracic extension. Alternatively, try the bottoms-up kettlebell carry, balancing the bell inverted on your palm to challenge shoulder stability and grip simultaneously.
ข้อผิดพลาดที่พบบ่อย
Most lifters sabotage this movement by letting the elbow drift forward or flare outward, which transfers dangerous shear force into the shoulder capsule. Another frequent error is collapsing the ribcage and compensating by hyperextending the lower back, which completely defeats the anti-rotation purpose of the carry. Many also take overly long, heavy strides that disrupt their center of gravity and force the spine to sway laterally with every step. Finally, people tend to shrug the working shoulder toward the ear as grip fatigue sets in, abandoning lat engagement and turning a controlled stability drill into a sloppy, uneven haul.
ตารางฝึก
- Sets
- 3
- Reps
- 30-40 steps per side
- Rest
- 90s
- RPE
- 8
- Per set
- ~120s
- ความถี่
- 2-3x/week
Increase walking distance or step count first, then progress to heavier kettlebells, and finally add pauses or directional changes.
Cues
กล้ามเนื้อ
- Upper back
- Shoulders
- Abs
- Obliques
- Forearms
- Glutes
อุปกรณ์
- Kettlebell
- 1
Stand with your feet shoulder-width apart and place the kettlebell on the floor directly between your toes.
- 2
Hinge at the hips, grip the kettlebell handle with one hand, and drive through your heels to stand fully upright.
- 3
Bring the kettlebell to your shoulder so it rests on the outside of your forearm, fist near your collarbone, wrist straight, and elbow tucked tight against your ribs.
- 4
Let your free arm hang relaxed by your side, inhale deeply, brace your core, and stack your ribs over your pelvis.
- 5
Step forward with short deliberate steps while keeping your chest tall, gaze forward, and the weight stationary.
- 6
Exhale steadily through your mouth as you bring your trailing foot forward to close the gap, maintaining a slow walking rhythm.
- 7
Plant both feet firmly, hinge at the hips, and guide the kettlebell down to the floor with controlled tension.
- 8
Repeat the entire sequence holding the kettlebell in the opposite hand to switch sides.