
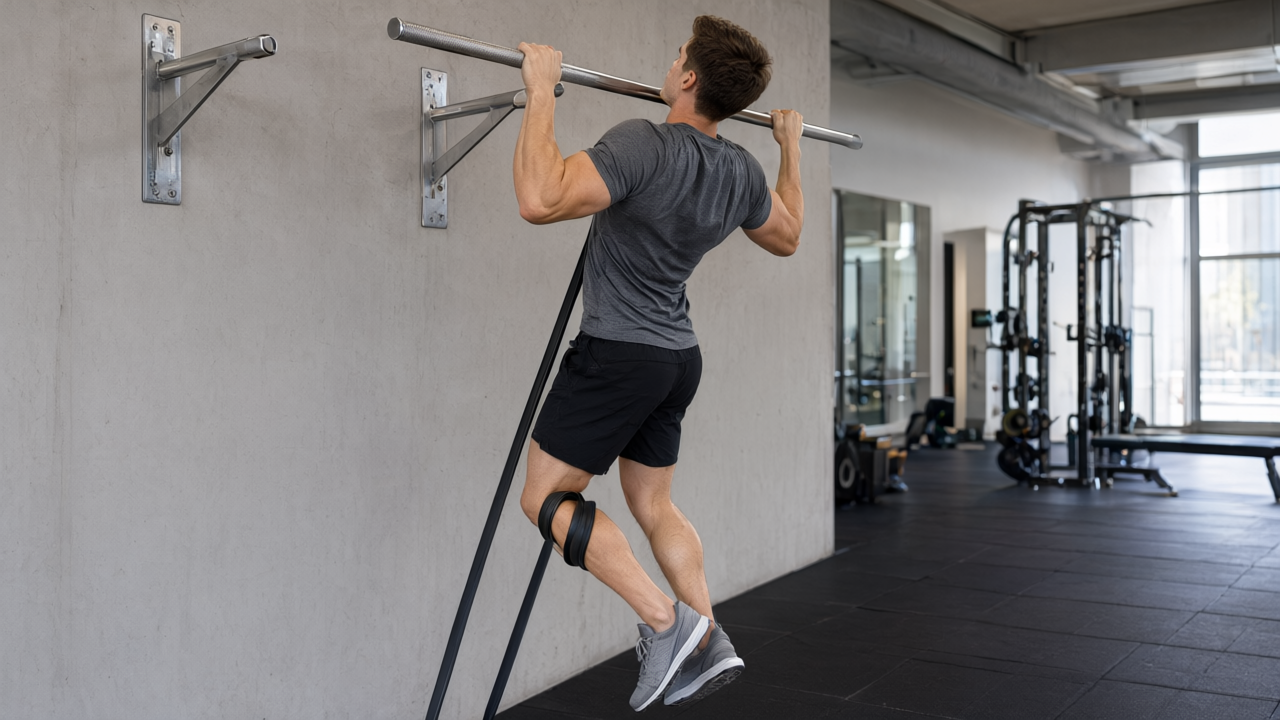
Assisted Pull-Up
assisted-pull-up
Fai attenzione con
- avoid · Rotator cuff tear — Hanging under load places high tensile stress on the rotator cuff tendons during stabilization. Instead, use seated cable rows to strengthen the back without loading the healing cuff.
- caution · Uncontrolled hypertension — Bracing hard through a whole-body pull raises blood pressure sharply, and holding the breath at the top of a rep does it further. Breathe continuously through every rep, keep assistance generous so sets stay well short of failure, and use a chest-supported machine row instead if numbers are running high. Stop if you get a headache, flushing or light-headedness mid-set.
- caution · Shoulder impingement — Overhead gripping with shoulders depressed can pinch impinged tissues at end range. Instead, perform lat pulldowns with a neutral grip to train the vertical pull with less shoulder compression.
- caution · Pregnancy — Hanging stretches the abdominal wall while bracing increases intra-abdominal pressure against the growing uterus. Instead, perform kneeling lat pulldowns to train the same pulling pattern safely.
- modify · Acute knee injury — The band loads the back of the knee in deep flexion and can press directly into the joint line on the way down. Loop it under the thigh instead of behind the knee, keep the descent slow so the band does not snap into the joint, or use a seated lat pulldown where nothing loads the knee at all.
A band-assisted vertical pull: the resistance band carries the share of your bodyweight your back cannot yet move, so you train the real pull-up path — full hang to chin over bar — with a load you can control. Band thickness sets the amount of help. A gym's assisted pull-up machine or a lat pulldown trains the same pattern if you have no bar to hang from.
Se sei nuovo in questo
As a beginner, focus on quality over quantity. Start with enough assistance to complete six to ten clean repetitions. Your elbows should track downward, not flare outward, and your shoulders must stay packed, never creeping toward your ears. If you feel your lower back arching excessively or your body swinging like a pendulum, you are using too little assistance or rushing the tempo. Stop immediately if your grip slips, your shoulders pinch, or your form collapses mid-rep. Failure here should feel like your back muscles simply cannot contract any further, not like your joints are grinding or compensating with your neck. Breathe rhythmically and reset between sets. Remember that building the neurological pathway for a vertical pull takes patience. Celebrate the small victories of controlled eccentrics and full range of motion. Your goal is to gradually reduce assistance as your back strength grows, not to rush toward unassisted reps with compromised mechanics. Stay patient, stay strict, and let the movement unfold naturally.
Andare oltre
Extend the lowering phase to four or five seconds, and add a two-second dead hang at the bottom to eliminate any residual elastic energy from the band. This forces your lats to initiate every single repetition from a complete stop. The eight-to-twelve range builds capacity, but once you can manage three sets of twelve with strict tempo, switch to a thinner band and work in sets of five to eight to prioritise strength. Harder here means less assistance, not more repetitions; progress by stepping down through lighter bands until you are looping only the thinnest one available. When you can perform six controlled reps with minimal band tension, begin alternating those sets with unassisted negatives on the pull-up bar. For variation, try a close neutral grip if your bar allows it, which shifts emphasis towards the lower lats and brachialis, or use a thicker band to overload the top half of the movement where you are naturally strongest.
Errori comuni
The usual error is treating the band as a slingshot: dropping fast and bouncing out of the bottom stretch to launch the chin over the bar, which trades the hardest part of the rep for a number. Shrugging at the top does the same damage from the other end — the traps and neck take over and the lats never learn to load. Some people take too little assistance and finish reps with the head thrusting and the lower back arching, which is where shoulders get pinched. The fix is the same in every case: pick a band heavy enough that the last two reps are slow but strict, keep the shoulders packed away from the ears, and own the three-second descent.
Routine
- Sets
- 3
- Reps
- 8-12
- Rest
- 90s
- Tempo
- 2-0-1-0
- RPE
- 8
- Per set
- ~180s
- Frequenza
- 2-3x/week
Gradually reduce assistance by switching to lighter resistance bands or decreasing the machine counterweight until you can perform the target range unassisted.
Cues
Muscoli
- Lats
- Upper back
- Biceps
- Forearms
- Abs
Attrezzatura
- Bodyweight
- Resistance bands
- Pull-up bar
- 1
Loop a resistance band over the pull-up bar and hang your weight on it once before you step in, to confirm the bar is solid and the band has no nicks.
- 2
Step one foot or knee securely into the band loop, spreading the band flat across the joint rather than letting it dig into one point.
- 3
Grip the bar with palms facing away and hands slightly wider than shoulder-width.
- 4
Hang with arms fully extended and shoulders depressed away from your ears, exhaling to brace the core and set the back muscles.
- 5
Inhale, then pull the elbows down and back to drive your chest up toward the bar.
- 6
Continue the ascent until your chin clears the bar, letting the band take your weight instead of shrugging your shoulders up to finish the rep.
- 7
Exhale and pause briefly at the top with the shoulders packed and the torso rigid — no kick, no swing.
- 8
Inhale and lower slowly over three seconds until the arms return to full extension and the shoulders are back under control.
- 9
Step out of the band only once your feet are under you and you are steady, rather than dropping the last rep's weight straight to the floor.
- 10
Unhook the band from the bar and coil it away where nobody will trip over it.