
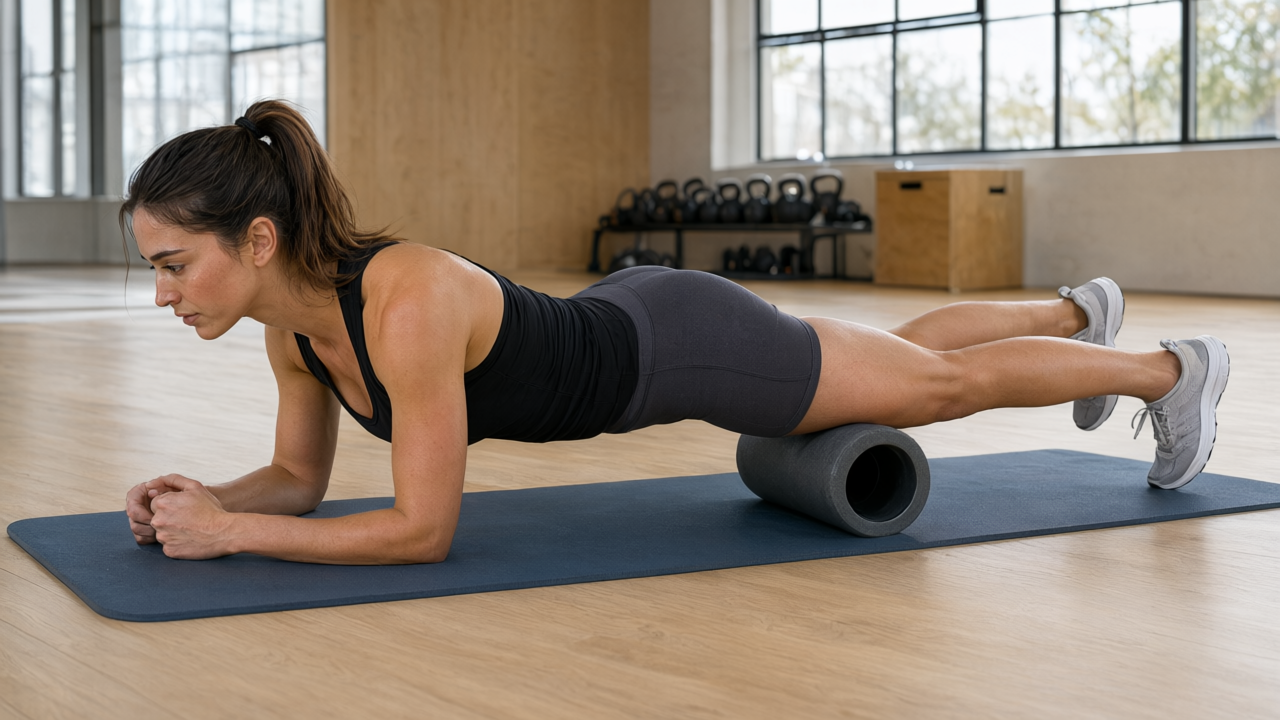
Foam Roll Quads
foam-roll-quads
انتبه عند
- caution · Acute knee injury — Rolling near the patella may aggravate inflamed knee structures. Instead, limit the rolling range to the upper two-thirds of the thigh, well away from the joint.
When I cue you into this cooldown, I want you to release tension in the front of your thighs. You will lie face down on a mat with a foam roller beneath one quad, using your forearms for support. Rolling slowly from above the knee to below the hip crease eases tightness after squats, lunges or running. Breathe steadily throughout.
إذا كنت جديدًا على هذا
The first time you try this, you will likely rush the movement or hold your breath when you hit a sore spot. Both habits reduce the benefit. Move at roughly one inch per second; faster rolling merely skims the surface without releasing deeper tissue tension. When you find a tender area, stop rolling entirely. Rest there, breathe out slowly, and wait for the discomfort to ease by about half before continuing. Do not roll directly over the kneecap or into the hip joint itself. Stay between those two landmarks. Your supporting forearms should bear enough weight to control the pressure. If it feels unbearable, shift more load onto your arms or keep the non-working foot flat on the mat for stability. It should feel like a firm, tolerable massage, never sharp pain. Stop immediately if you feel numbness or tingling down the leg. Sixty to ninety seconds per leg is plenty for your first session.
المضي قدماً
Once basic rolling feels manageable, slow your tempo further to three to four seconds per inch. Spend two full minutes per leg during your cooldown. To increase intensity, stack your non-working ankle directly over the working ankle, driving more bodyweight into the foam roller. For targeted work, pause on a tender spot and slowly bend and straighten the working knee five times while maintaining pressure; this pin-and-stretch technique addresses stubborn fascial restrictions. Progress to a firmer roller only when your current one no longer provides adequate sensation. Avoid jumping straight to textured rollers, as excessive aggression can cause protective muscle guarding rather than release. Use this specifically after heavy quad-dominant sessions like barbell squats or sprint intervals to restore resting length and improve subsequent recovery.
أخطاء شائعة
Rolling too quickly is the most frequent error. Speed prevents the nervous system from relaxing the tissue, turning a release drill into mere friction. Slow down to one inch per second. Another mistake is rolling directly over the kneecap or the bony point of the hip. This compresses joints rather than muscle, causing unnecessary irritation. Keep the roller strictly on the fleshy quadriceps belly. Holding your breath when encountering a tender spot causes your muscles to guard and tighten further. Exhale deliberately to signal relaxation. Finally, letting the hips twist or sag shifts pressure unevenly across the thigh. Keep your pelvis level and parallel to the mat so the entire quad receives consistent contact. Correcting these details transforms an uncomfortable chore into genuinely effective recovery.
الروتين
- Sets
- 1
- Reps
- 60–90 seconds per side
- Rest
- 0s
- Tempo
- slow, 1 inch per second
- RPE
- 4
- Per set
- ~90s
- التكرار
- 5
increase duration to 2 minutes or stack legs for more pressure
Cues
العضلات
- Quadriceps
- Hip flexors
المعدات
- Foam roller
- Mat
- 1
Place a mat on the floor and position a foam roller horizontally across it.
- 2
Lie face down on the mat, resting your weight on your forearms with elbows under shoulders.
- 3
Slide one thigh on top of the foam roller, positioning it just above the kneecap.
- 4
Bend your opposite leg out to the side or stack it on top for added pressure.
- 5
Keep your spine neutral and hips square as you press gently into the roller.
- 6
Slowly roll your body forward, moving the foam roller up towards your hip crease.
- 7
Pause for twenty to thirty seconds on any tender spots, exhaling fully as you hold.
- 8
Roll back down towards the knee, maintaining steady pressure through your forearms.
- 9
Repeat the entire sequence on the opposite leg once you have finished the first side.