
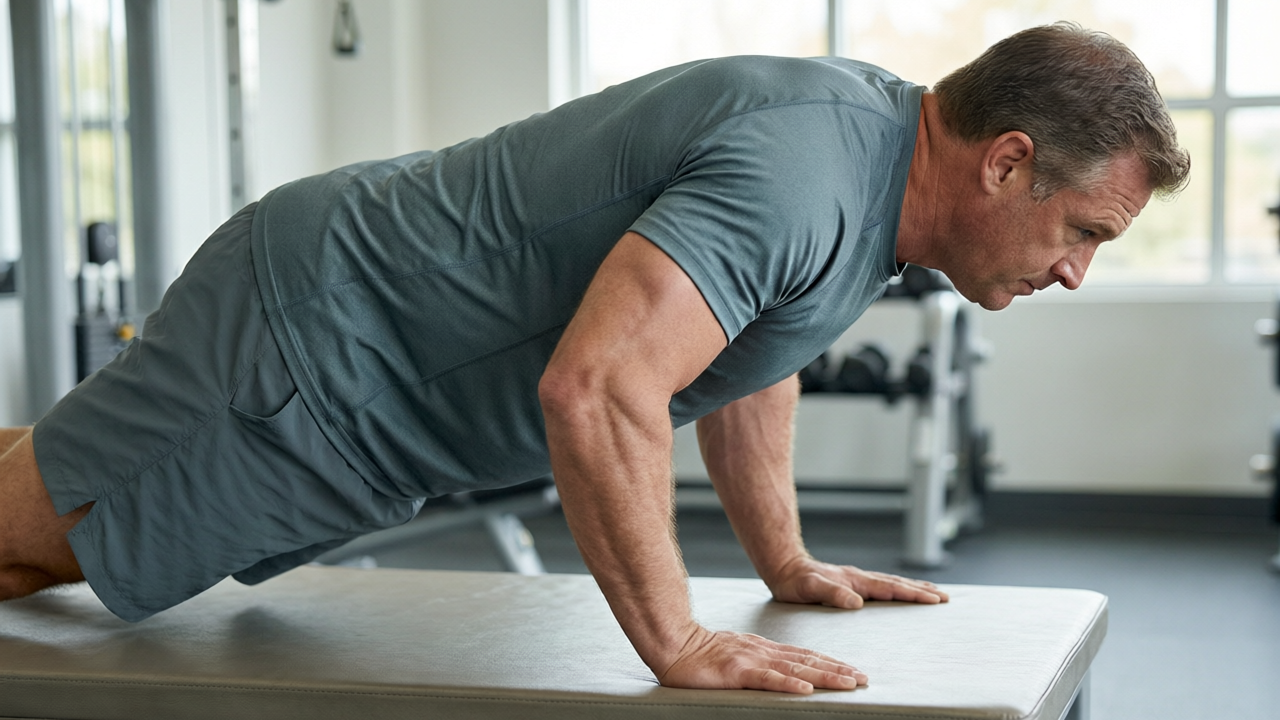
Incline Push-Up
incline-push-up
When I cue you into an incline push-up, I am asking you to perform a horizontal pressing movement with your hands elevated on a bench and your feet planted on the floor. This raised hand position reduces the amount of bodyweight you must lift, making it the ideal regression before attempting a full floor push-up. It builds strength in your chest, shoulders, and triceps while teaching you how to maintain a rigid, braced torso under load.
はじめての方へ
The first time you try this, your instinct will likely be to let your hips sag toward the floor or pike them high into the air. Both break the straight line your body needs to hold. Before you bend your elbows, squeeze your glutes hard and brace your stomach as if someone is about to poke you. That locks your hips directly beneath your shoulders. You might also flare your elbows out wide like wings, which shifts stress onto your shoulder joints. Instead, imagine tucking your elbows back toward your pockets as you lower down. The movement should feel like a controlled lean, not a collapse. Your chest should gently meet the edge of the bench without bouncing off it. If you cannot lower yourself without your hips dropping or your elbows flaring uncontrollably, stop the set. Rest, reset your plank position, and try again. Mastering this stable, braced pattern here is exactly what prepares your body for the floor version later.
さらに先へ
Slow the lowering phase to a deliberate three-second count, pausing for a full second with your chest resting lightly on the bench before pressing up. That pause eliminates momentum and forces your chest and triceps to initiate every repetition. Because this is a bodyweight movement, making it harder means changing your leverage rather than adding load. Once you can complete sets of fifteen to twenty controlled repetitions at your current height without losing tension, lower your hands to a shorter surface such as a low step or stacked plates. Each reduction in height shifts more of your bodyweight onto your pressing muscles. When you can perform strict sets of twelve with your hands only slightly above the floor, you are ready for the standard push-up. To bias different tissues at your current height, try placing your hands closer together to increase triceps demand, or widen them slightly to emphasise the chest.
よくあるミス
The most frequent error is letting the hips sag toward the floor, which happens when the core goes slack. This places excessive strain on the lower back and removes tension from the working muscles. Fix this by squeezing your glutes and bracing your abdomen before every single repetition. Another common mistake is flaring the elbows out to ninety degrees, which grinds the shoulder joint and reduces chest engagement. Keep your elbows tucked at roughly a forty-five-degree angle to your torso throughout the descent. Beginners also tend to jut their chin forward to reach the bench sooner, creating neck strain. Your head should stay neutral, aligned with your spine, so your chest makes contact first. Finally, rushing the lowering phase turns the movement into a drop rather than a press. Control the descent all the way down so your muscles do the work, not gravity.
ルーティン
- RPE
- 7
- Per set
- ~90s
Cues
筋肉
- Chest
- Triceps
- Shoulders
道具
- Bodyweight
- Bench
- 1
Place your hands shoulder-width apart on the edge of a bench, fingers pointing forward, and step your feet back until your legs are straight.
- 2
Brace your core, squeeze your glutes, and align your hips with your shoulders so your body forms one straight line from head to heels.
- 3
Inhale as you bend your elbows, keeping them tucked close to your ribs rather than flaring them wide.
- 4
Lower your body in a straight line until your chest lightly touches the edge of the bench.
- 5
Exhale to press straight up through your palms, extending your elbows fully to return to the starting position.